Today we have a new guest designer: Lisa.
Look what a very beautiful mini album she made:
This is the cover of the Mini Album. I have used the biggest rectangle die for the base,
This is the cover of the Mini Album. I have used the biggest rectangle die for the base,
and the next 2 smaller ones to layer to make the cover strong.
The middle layer is chip board and the other 2 layers are heavy cardstock.
For the spine I used the rectangle stitched die, but customized it for the spine by replacing the die onto one already die cut. This gave me the perfect size for the spine.
I did the same for the title strip.

This is close up of the top of the album showing the insides of the different interactive pages.

These 2 pages have flaps that open up to reveal more space. The flaps were created with the tags die, and pockets were added using the rectangle die to hold smaller tags. I layered the rectangle die cuts over the top of the Big Labelzz and Tagzz that are tucked into the pockets.

Here is the left side flap opened. I created a small bellyband to hold some rectangle die cuts that can be used for photos or journaling in the back.
Here is the right side opened and this one has a small pocket created with the
rectangle die and it holds another tag.
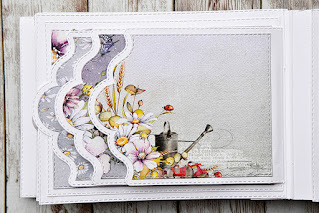
I die cut 3 tags and created a staggered effect for 3 flaps that open like pages. I then die cut the patterned paper to fit the covers of the flaps. Once again, I just readjusted the die over the die cut tags to create shorter die cuts. This way, the stitching remains all around the tag. 
On this page there are 2 flaps that open up vertically.

When closed, each flap holds a tag. I punched a semicircle into the patterned paper used for the pocket to hold the tag.
On the inside of the back cover I created a waterfall slider card.
When closed, each flap holds a tag. I punched a semicircle into the patterned paper used for the pocket to hold the tag.
These are so much fun, and so easy to create using dies.
I left the backside plain for photos or journaling.
I thought this was the perfect end to a mini album that I had so much fun creating using the Crealies Dies. I know I will be using these dies over and over to create future projects.
Lisa Gregory
Crealies Dies / Stansen:
Mini Albums Binder C
I left the backside plain for photos or journaling.
I thought this was the perfect end to a mini album that I had so much fun creating using the Crealies Dies. I know I will be using these dies over and over to create future projects.
Crealies Dies / Stansen:
Mini Albums Binder C
Lisa, thanks a lot for showing your lovely project.
Soon you can also see this on Lisa's blog.


Geen opmerkingen:
Een reactie posten